


 All over the Mediterranean, you'll find ever popular olive breads in every bakery and family kitchen. This bread is easy to make, though maybe a bit time consuming. However, it makes a wonderful cure for a boring afternoon or weekend, and fills your home with an embracing aroma.
I like to use oily olives or those marinated in herbs rather than canned ones, though canned olives are just as heavenly. You can also use parsley, mint, or cilantro, though I find cilantro to be the best choice for the subtle earthy play it places on your tongue.
This recipe makes a lot, as in you won't fit it in a bread machine, so you'll be doing this by hand. I use the dough hook on my Kitchen Aid, but even then I split the ingrdients in half and do it in two batches, then combine them when kneading it. Even though the idea of handmaking bread seems scary, it's very zen and relaxing.
During the fall and winter, this bread is a staple here, and it's absolutely wonderful for helping in your cold weather meals. Not only does the simple act of baking it warm your home and give that rustic aromatic, it's versatile for a variety of meals. We've used it for a variety of sandwiches. Dried, it makes for crunchy, flavorful croutons on salds. It compliments any soup, from smooth and creamy cream of onion, to chunky vegetable. Toast it in the morning for what I and many others describe as the best toast ever.
Olive Onion Bread
Adapted from "Mediterranean" by Joanna Farrow
Makes Two 1 1/2-Pound Loaves
What You'll Need...
2 red onions, thinly sliced
2 tablespoons olive oil
1 1/2 cups pitted green or black olives
7 cups all purpose flour
1 1/2 teaspoons of salt
4 teaspoons rapid rise yeast
3 tablespoons parsley
3 tablespoons cilantro or mint
What You'll Do...
1) Saute' the onions in the oil until soft. Coarsely chop the olives
2) Put the flour, salt, yeast, herbs in a large bowl, Add the olives and onions and pour in 2 cups of water. Do this in two batches if you need to. Mix the dough in a mixer with a dough hook attachment, a bread machine on the dough cycle, or with a round bladed knife. Add water if it feels dry.
3) Turn onto a lightly floured surface and knead for 10 minutes. Put in a clean bowl, cover with plastic wrap, and place in a warm place for it to double in bulk.
4) Preheat oven to 425 degrees. Lightly grease two baking sheets. Turn the dough out onto a lightly floured surface and cut in two. Shape into two round loaves and place on the sheets. Brush or pat on a light coat of olive oil. Let sit in a warm (not hot, warm) place, cover with plastic wrap, and let them double in size.
5) Slash the top with a knife to scar the top for a rustic appearence or lightly flour or sprinkle with dry or fresh parsley. Bake for about 40 minutes or until the loaves sound hollow when tapped on the bottom. Transfer to a wire rack (if you don't have one, go buy a cheap one, this wire rack allows for proper cooling and dispersion of moisture, otherwise the underside of the bread will become a bit wet with moisture).
Variations: If it raises, or stays flat for whatever reason, it's okay, don't panic. Flat or fluffy, it's tasty either way!!! You can also shape the dough into 16 small loaves and reduce the cooking time to 25 minutes.
Yayness! You're done. Snuggle with a good book and a big slice of bread, and be happy.
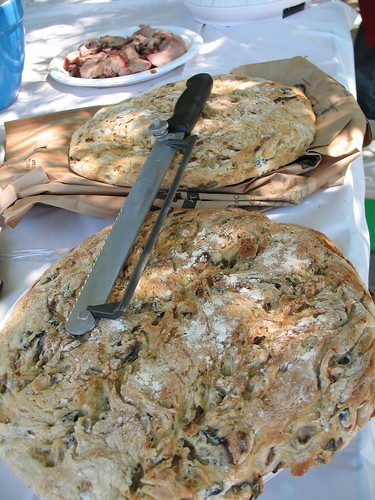
Picture by Penny, an shibby girl I had the pleasure to meet at the picnic.
Yayness indeed. That sounds divine! :)
ReplyDeleteI love baking bread! I try and get in a few loaves every week. I think I'll have to give this one a try. It looks wonderful!
ReplyDeleteLiz - It is!
ReplyDeleteNatalia - I hope you enjoy it!
Neelu - You have to thank P and Pengrin Eats for that particular picture! She's pretty freakin' awesome with a camera.
A secret too... This is like one of three things I can successfully bake half the time.
:P
You are an absolute doll! Thank you again for sharing this. I'll let you know when I attempt it myself. :)
ReplyDeletev.v.good - like anything though, it could be improved by lashings of good salted butter -am I alone in this people???
ReplyDeleteGarrett,
ReplyDeleteYou are awesome and this bread recipe is beautiful, I bake every Friday, this recipe is in my book this week!!! Love all the ingredients and I agree with you, cylantro is the right herb, I may try with rosemary, what do you think?
Christine - No sweat! Let me know how it goes!
ReplyDeleteKitty - Butter makes EVERYTHING better. Even more butter makes butter better.
Ruth- Thanks, glad you like it! Let me know how it goes! I think rosemary would be great. If you use marinated olives, use any of the herbs used in the marinade to compliment the flavors as an alternative too.
That sounds absolutely delicious! I can't wait to serve it up alongside my next Spinach Manicotti supper....and I feel for certain that'll be SOON! -Joi
ReplyDeleteIndependent review - here you go - you see I got the leftovers - hey I deserve them - that's MY breadknife in the picture!
ReplyDeleteReview is: totally awesome bread - super excellent IMHO for sandwiches and dipping in olive oil. Not so good for cinnamon toast - although I could be wrong about that - I didn't try it.
This looks simply scrumptious.
ReplyDelete